How To Use SDK (LabView Version)
1. Overview
-
This tutorial is intended to introduce you to the use of the SDK (LabView version). The SDK toolkit is designed to assist engineers in AI vision development. For software development, you need to download it from official website
-
The trained model file trained at [workbench] (https://www.neurobot.co/modelDevelopmentTool2)
-
SDK toolkit (LabView Version)
-
2.Environment setup
-
Supported OS versons: Window10/11 X64 platform
-
Software Dependency
- LabView(Minimum Version: 2020) Official download Address: https://www.ni.com/en/support/downloads/software-products/download.labview.html#487445
- LabView Vision Development module (The version corresponds to the LabView version) Official download Address: https://www.ni.com/en/support/downloads/software-products/download.vision-development-module.html#477810
Only supports NVIDIA GPU, does not support AMD and other brands.
- Supported graphics card types: Nvidia GPU (Support GPU whose compute capability is "6.1", "7.5", "8.6"). For details, see "Select Hardware" in the model download page of the workbench.
 Video card computing power can be found on Nvidia's official website
 Nvidia graphics driver download Address: https://www.nvidia.com/download/index.aspx
Alternate link: https://www.techpowerup.com/download/nvidia-geforce-graphics-drivers/
Nvidia graphics driver download Address: https://www.nvidia.com/download/index.aspx
Alternate link: https://www.techpowerup.com/download/nvidia-geforce-graphics-drivers/

3. Quick start with SDK
- Here is an example to help you quickly understand how to complete LabView software development using the SDK. This example uses LabView (Q3 2022 version) and the LabView Vision Development module (Q3 2022 version).
3.1 Decompress SDK
- Decompress the downloaded SDK file to a secure directory, as shown below:

3.2 Add environment path
-
Now start to add system environment variables, open "This computer", right-click the blank position, then select "Properties", click "advanced system Settings", click "environment variables", the following interface appears. Then select "Path" and click "Edit".

-
Click "New", then click "Browse":

-
Select the
binfolder under the SDK folder:
-
Move this environment variable up to the first one:


Click "OK" when the operation is complete.
3.3 Configuring the License File
- Please put the
License.txtfile in the SDK folder (The location of the License.txt file is subject to the current document) If you do not know how to generate the "License.txt" file, you can refer to this document:
https://docs.neurobot.co/en/latest/ModelDeployment/ActivateLicense/
If you do not know how to generate the "License.txt" file, you can refer to this document:
https://docs.neurobot.co/en/latest/ModelDeployment/ActivateLicense/
3.4 Modify and run the sample code
-
Double-click on the
dllrun0525.vifile in the SDK folder, as follows:
-
Click the folder icon next to
test image pathto select a single test image: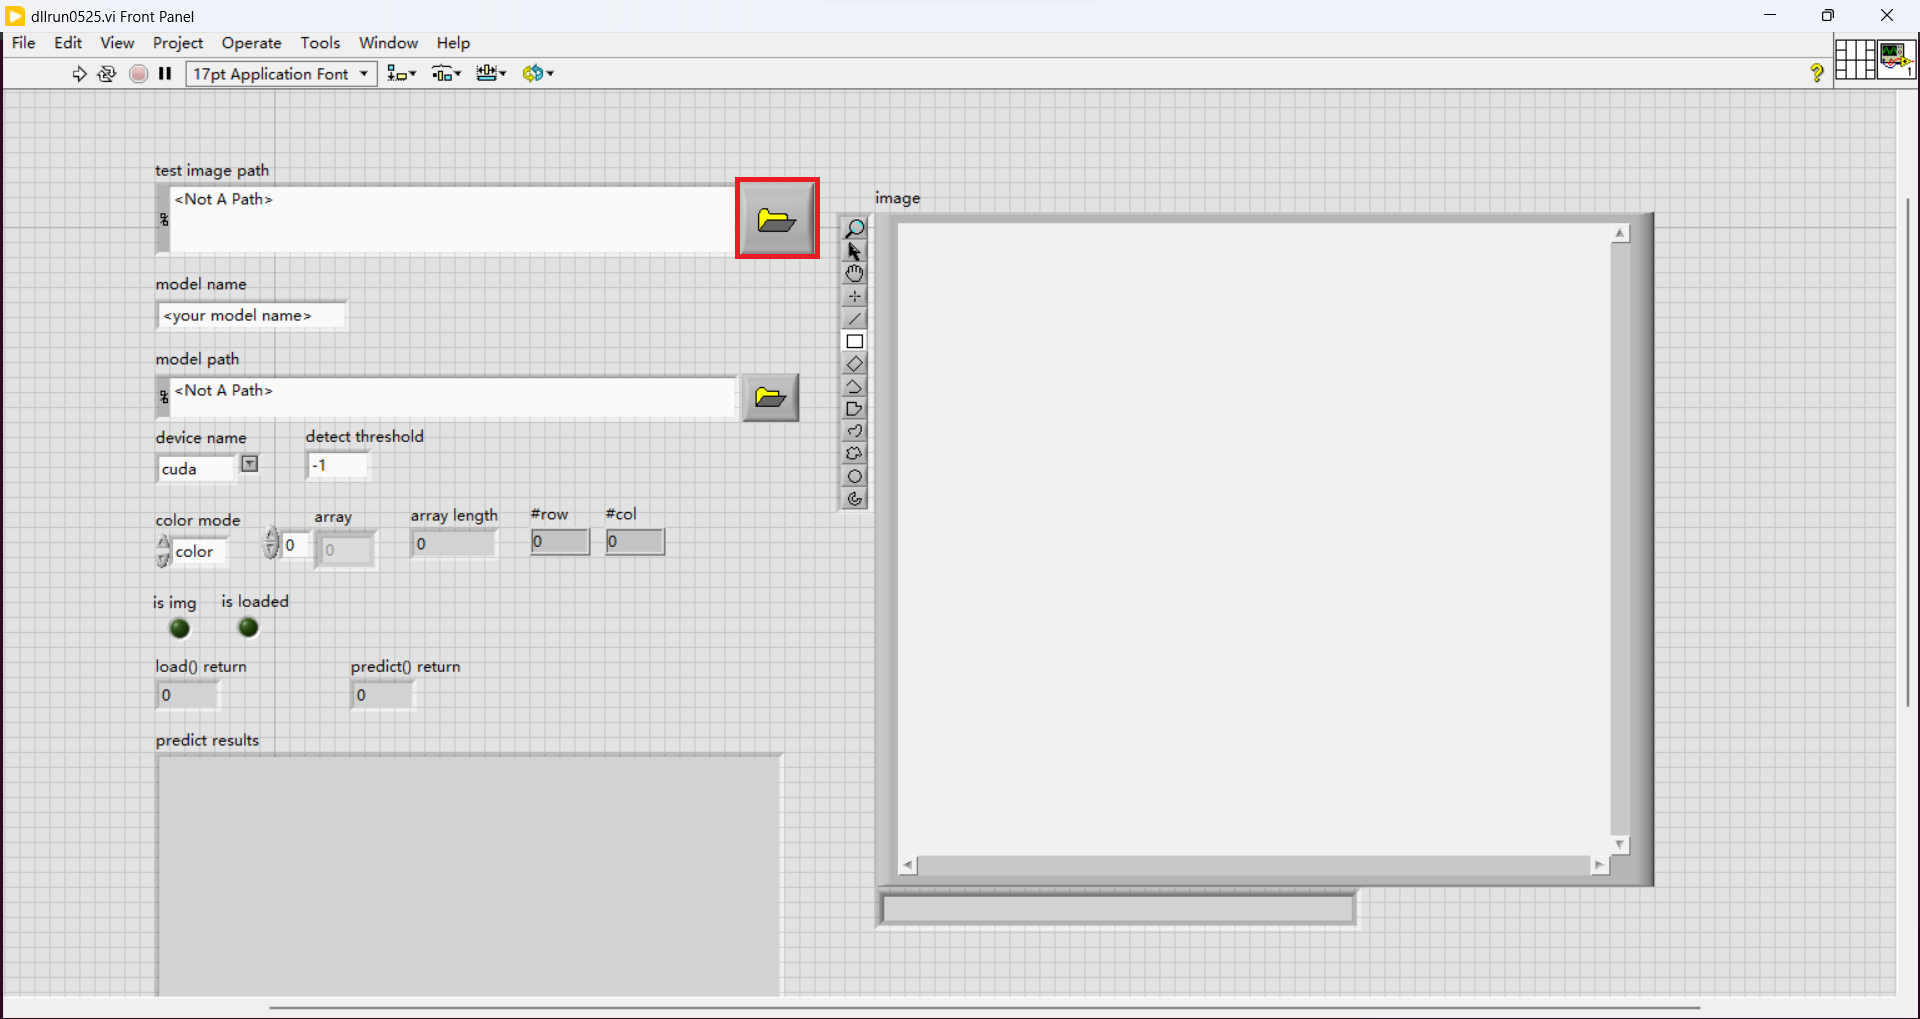


-
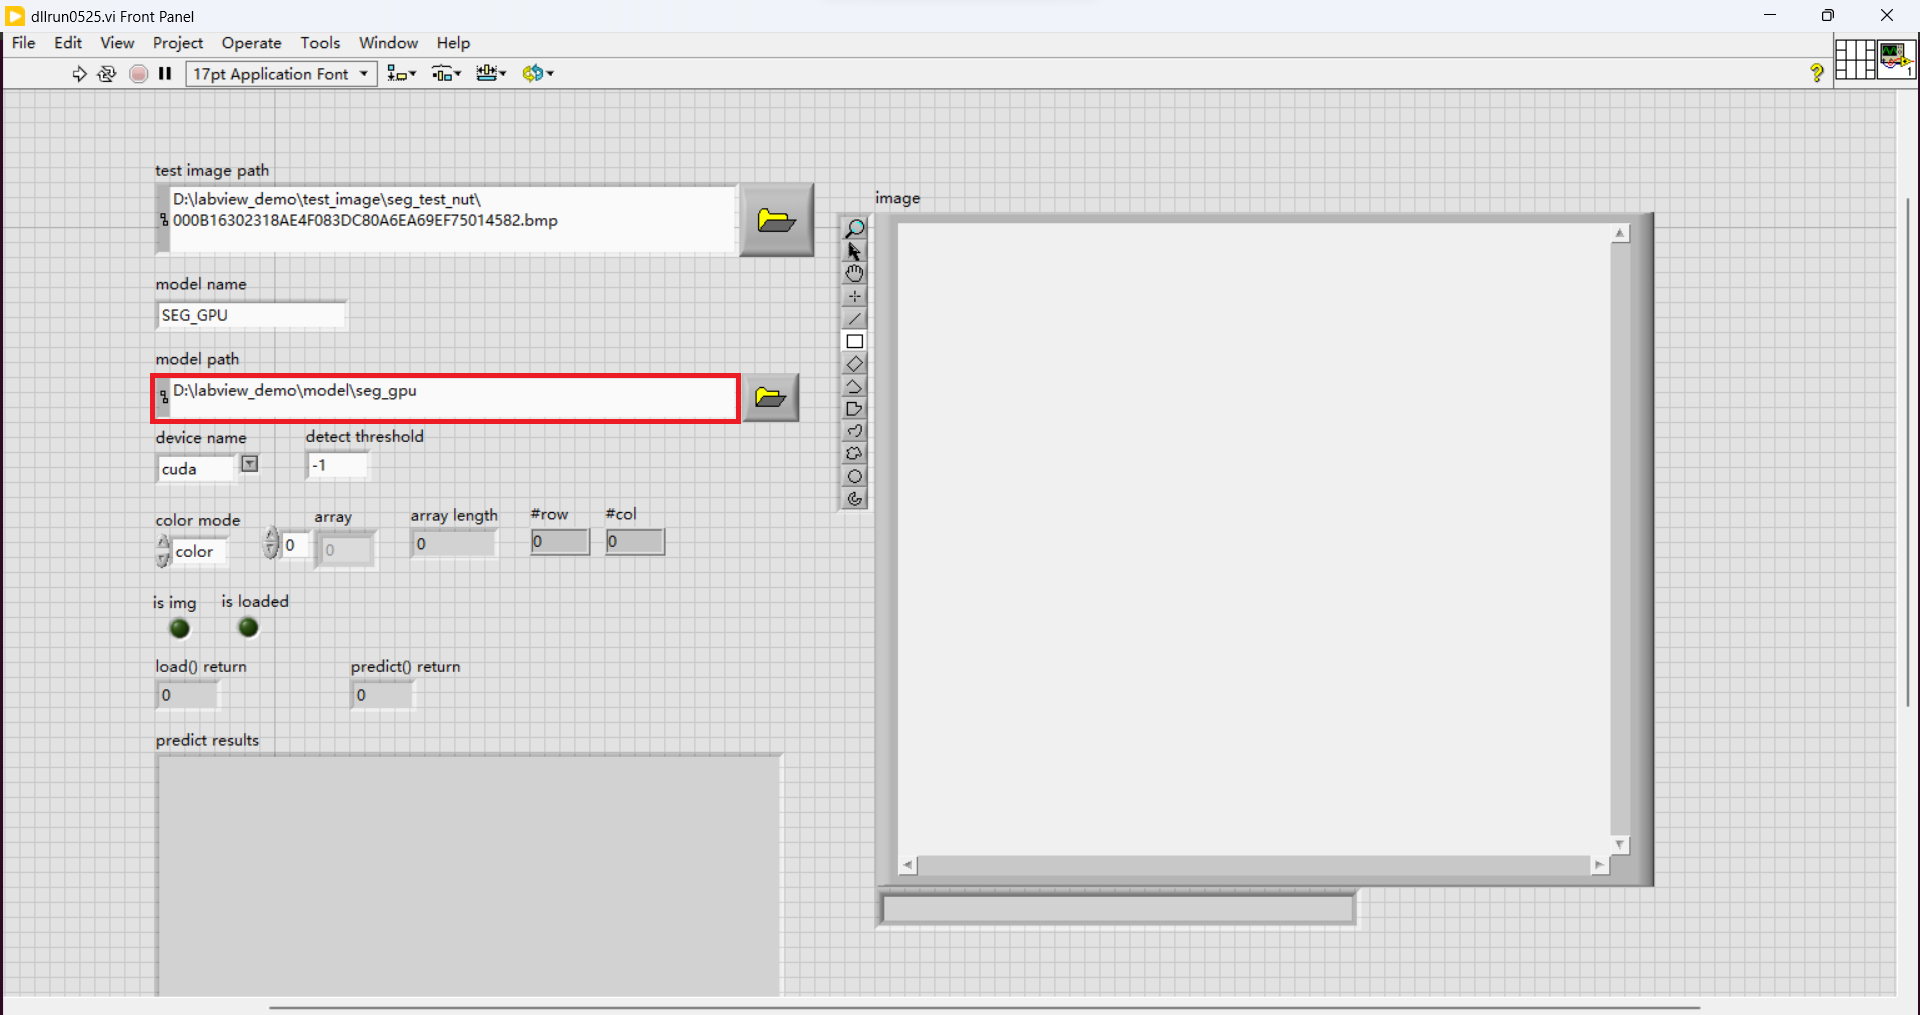
Modifying the model name

-
Click the folder icon next to
model pathto select a folder to store the model file

-
Select
device name(For CPU processing please selectcpu; for GPU processing please selectcuda)
-
Set
detect threshold(Detection threshold. If the detection threshold is exceeded, it is regarded as the target object.detect threshold = -1indicates the default value. The default detection threshold is0.7)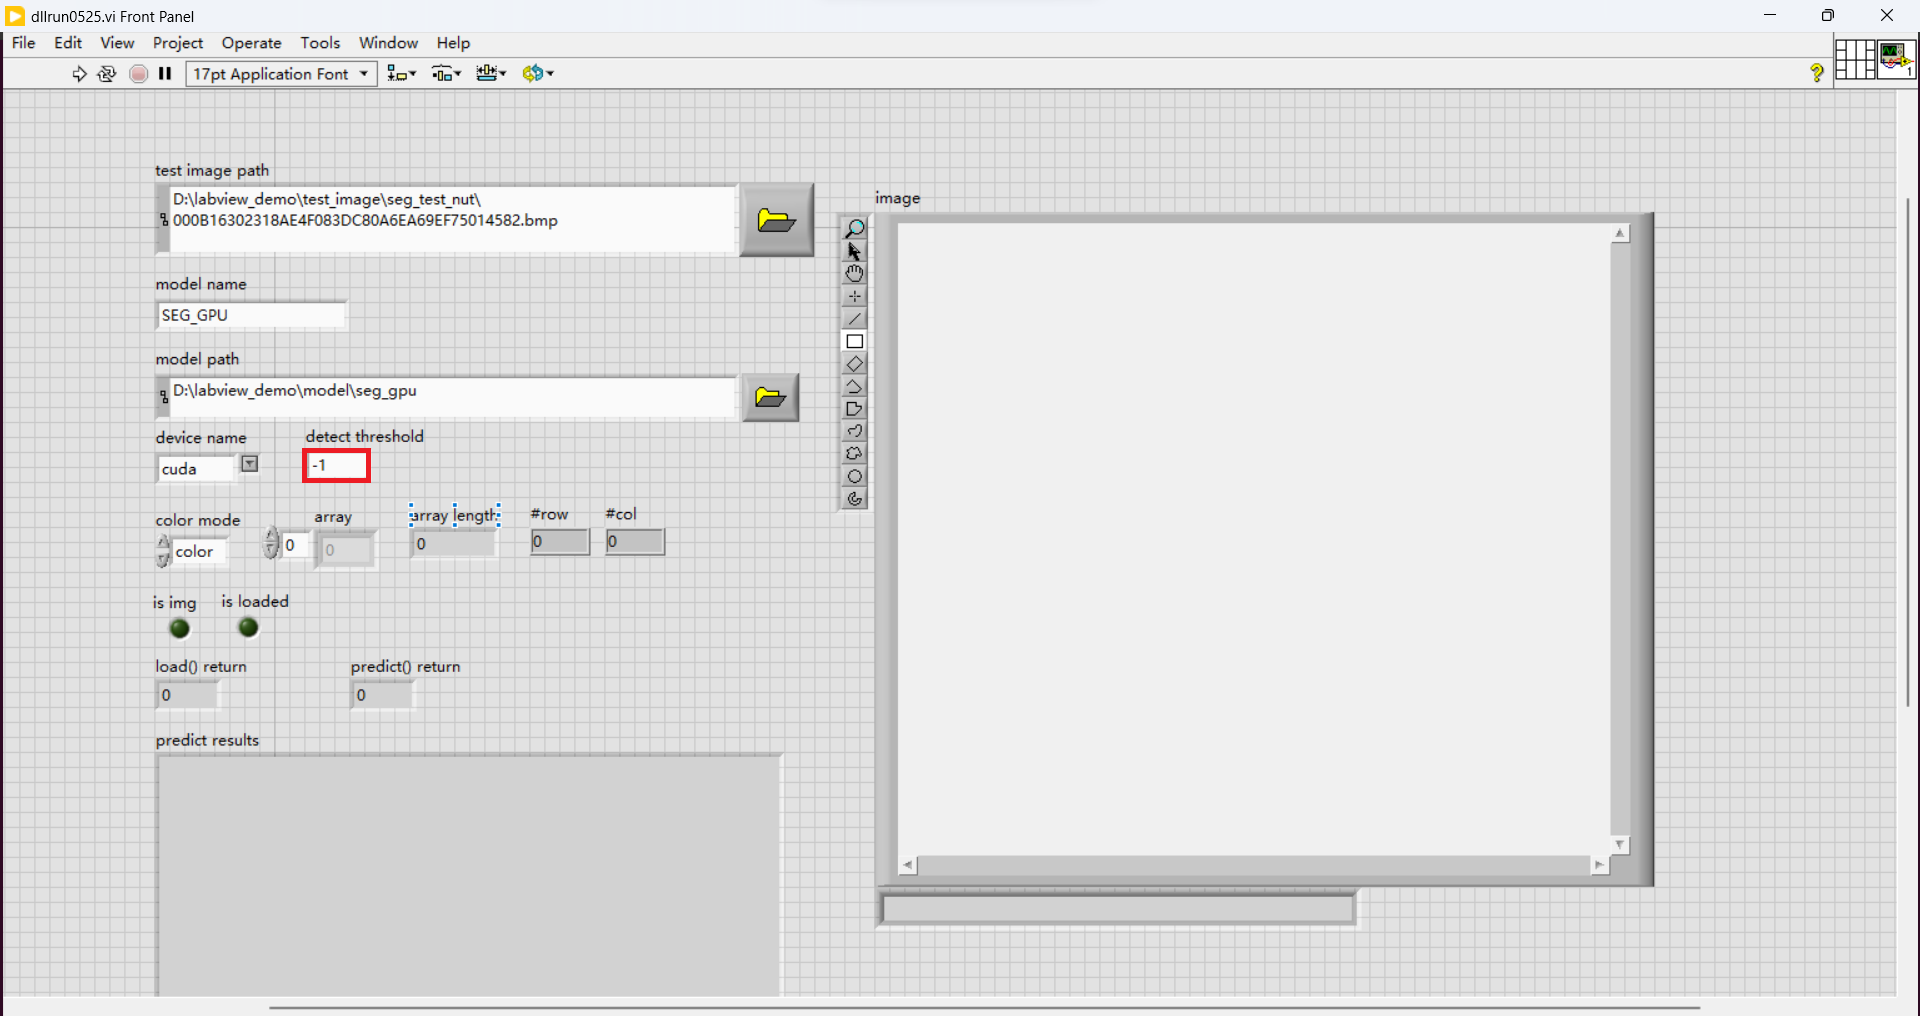
-
Select
color mode(For color Image (RGB), Please selectcolor; For grayscale images, selectgray)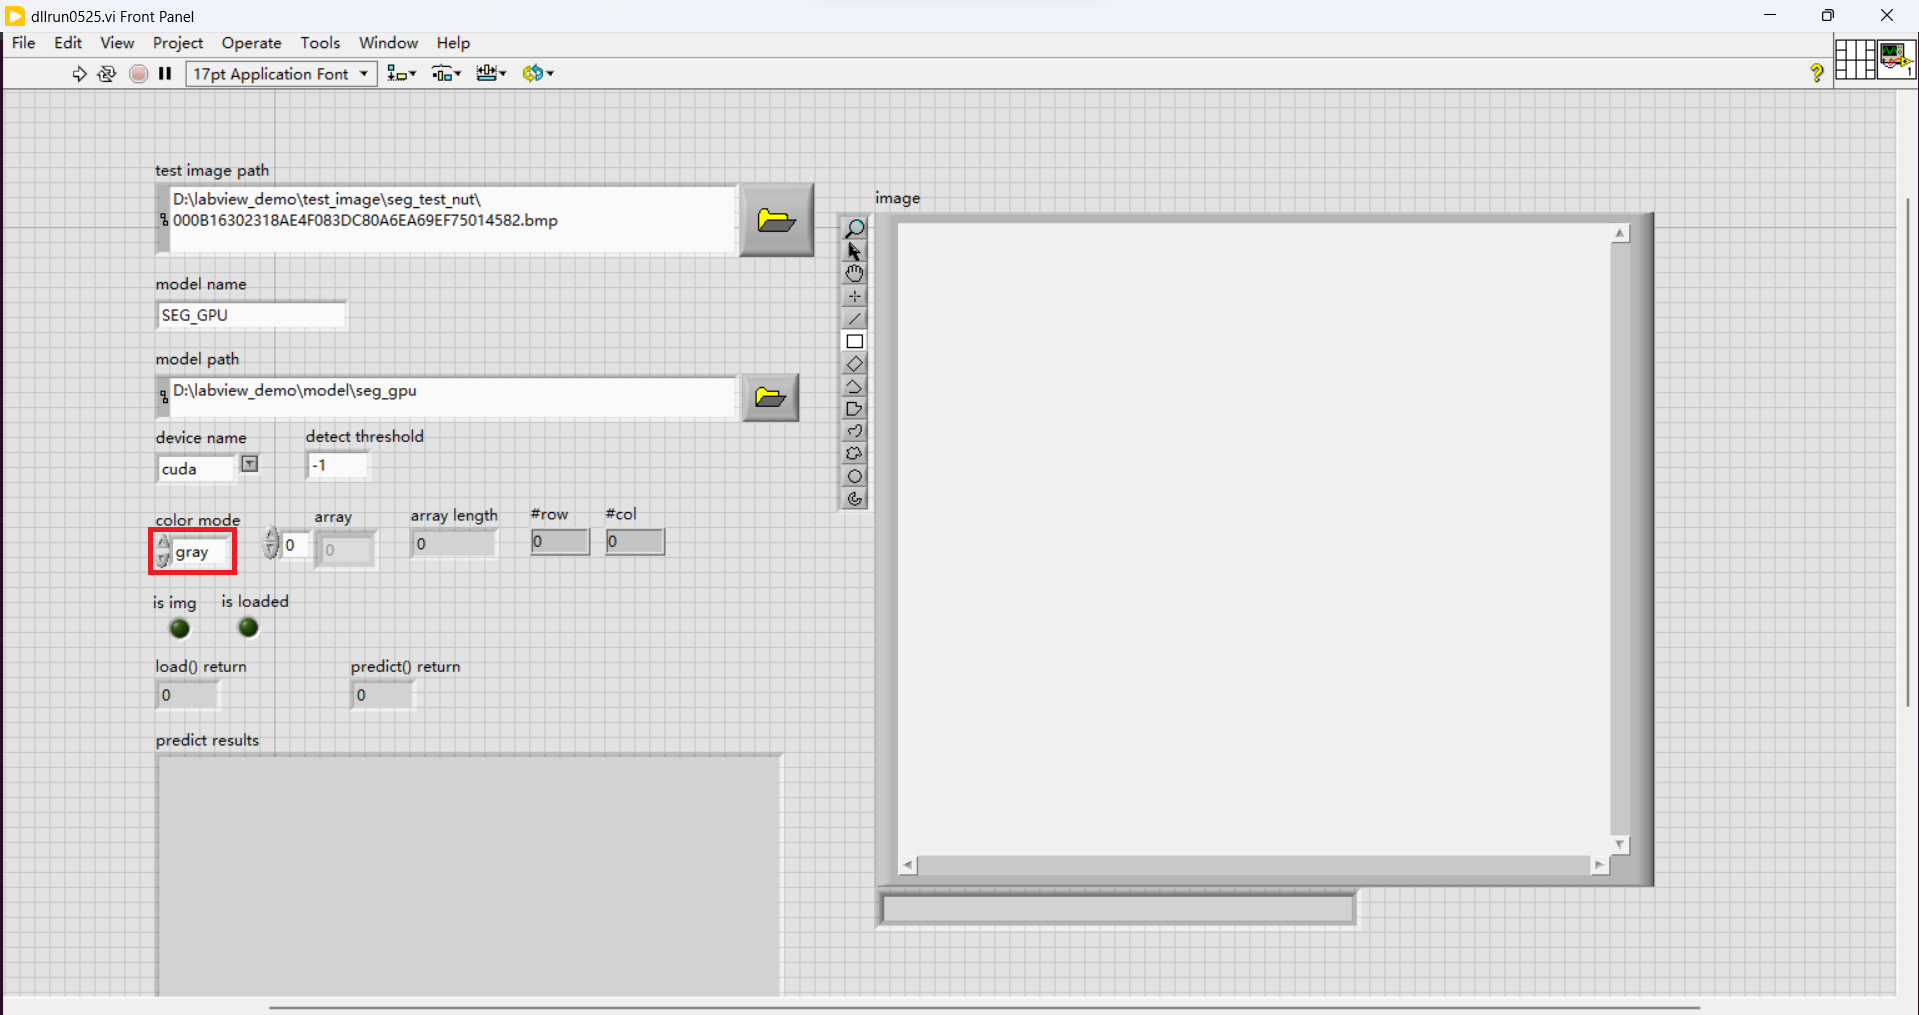
-
Click the (run) button in the upper left corner to run the program.
 The results are as follows:

-
If an error occurs in the program, look at these four places to analyze the cause of the error:
is img,is loaded,load() returnandpredict() return. - If
is imgis green on, the image is successfully loaded. Otherwise, the image fails to be loaded. - If
is loadedis green on, indicates that the model is loaded. Otherwise, the model is not loaded. - If
load() returndisplays 0, the model has been successfully loaded. Otherwise, the module fails to be loaded. - If
predict() returndisplays 0, the model prediction success. Otherwise, model prediction failure. Function Call Explanation section defines the various return values forload() returnandpredict() return. Attention: If an error occurs in the program, the problem is found and corrected, and the error still occurs when running again, please restart LabView and run again!!
4. Format of inference result
- The result of the model's inference on a single image is a
string type, which is stored inpredict results, as follows:
- There can be multiple inference results for a single photo, and the specific format of a single result is:
x0,y0,x1,y1,score,label,label_index,row_index,col_index;mask_width;mask_height;
Note: Results are separated by "," or ";" with no space between them
| variable | definition |
|---|---|
x0 |
x value of the top left corner of the detect rectangular box(bounding box) |
y0 |
y value of the top left corner of the detect rectangular box(bounding box) |
x1 |
x value of the bottom right corner of the detect rectangular box(bounding box) |
y1 |
y value of the bottom right corner of the detect rectangular box(bounding box) |
score |
The confidence of the detection result(confidence score) |
label |
The label of the detection result |
label_index |
The label index of the detection result |
row_index |
OCR is used for the automatic arrangement, in development, can be ignored for the time being |
col_index |
OCR is used for the automatic arrangement, in development, can be ignored for the time being |
mask_width |
Used for pixel segmentation, in development, can be ignored for the time being |
mask_height |
Used for pixel segmentation, in development, can be ignored for the time being |
5. Function Call Explanation
dllrun0525.vicited several vi SDK directory file, which is important:DestroyModel_525.vi,LoadModel_525.viandPredictModel_525.viThese three files respectively refer:load_model()inneurobot_LabVIEW_Model_SDK_CN_V3.0\bin\neuro_det_sdk.dll, ThenewPredict_modelVec()anddestroy_model()functions (you can open the Block Diagram to see it).
5.1 load_model()
int load_model(const char* model_name, const char* model_path, const char* device_name = "cuda", const int device_index = 0);
-
Definition:
- This function is used to load the model.
-
Parameter Explanation:
| Parameter | Explanation |
|---|---|
| model_name | The name of the model |
| model_Path | The path of the model |
| device_name | "device_name=cpu" for running CPU; "device_name="cuda" for running GPU |
| device_index | The graphics card device number to load the model. The default value is 0 (the default), you can also modify the number for other devices. |
- Return value:
- Returns an int type variable. 0 indicates success, and any other numbers are error codes, as shown here:
| Return value | Definition |
|---|---|
| 0 | Successful execution |
| 1 | Configuration file not found |
| 2 | Batch parameter not found |
| 3 | dete_thres parameter not found |
| 4 | Class parameter not found |
| 5 | Missing required DLL files for execution |
| 6 | ARG - NVIDIA GPU error |
| 7 | Not supported |
| 8 | Out of bounds |
| 9 | Insufficient memory |
| 10 | Model-related files for loading do not exist |
| 11 | Loading failed |
| 12 | Status count |
| 50 | Model type error or unable to read model.conf file |
| 100 | Using the wrong model type |
5.2 newPredict_modelVec()
int newPredict_modelVec(const char* model_name, uchar* ImgVec, int length, int row, int col, char* ret, float detect_thres = -1.0);
-
Definition:
- This function is used to predict the image to be tested.
-
Parameter Explanation:
| Parameter | Explanation |
|---|---|
| model_name | The name of the model |
| ImgVec | Image rgb array (u8 type array) |
| length | Image rgb array length |
| row | height of the image |
| col | width of the image |
| ret | Predicting return values |
| detect_threshold | detect the threshold, If the detection threshold is exceeded, it is regarded as the target object. detectThreshold=-1 represents the default value, which is 0.7. |
- Return value:
- Returns an int variable. 0 indicates successful execution, and any other numbers are error codes, status code are as follows:
| status | definition |
|---|---|
| 0 | Successful execution |
| 1 | Nvidia graphics card error |
| 2 | Not supported |
| 3 | Seams |
| 4 | Out of memory |
| 5 | Used to predict the related file does not exist |
| 6 | predict failure |
| 7 | state count |
| 50 | license file does not exist or without permission to read |
| 51 | License file format is incorrect |
| 52 | license file format can not match the fingerprint |
| 53 | Authorization start time is not reached |
| 54 | Expiration of authorization |
| 55 | System time has been rolled back |
| 56 | No write authorization file permission |
| 57 | An unknown error related authorized |
| 58 | Authorization file version is different from the SDK version |
| 59 | The number of tags exceeds the limit |
5.3 destroy_model()
void destroy_model(const char* model_name);
-
Definition:
- This function is used to clear the model from the graphics card
-
Parameter Explanation:
| Parameter | Explanation |
|---|---|
| model_name | Name of Model |
- Return value:
- None