Advanced Applications
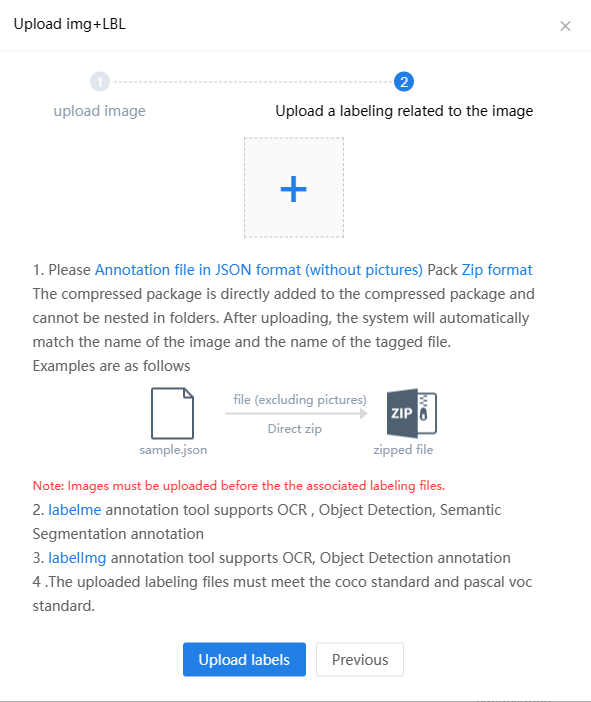
Upload img+LBL
If you want to upload locally labeled images, you can click on "Upload Image + Annotation" in the Labeling interface. By using this feature, you can avoid online labeling!

Currently supported offline labeling tools are Labelme and LabelImg.
For Labelme, the OCR , object detection, and semantic segmentation are supported.
For LabelImg, only OCR and object detection are supported, semantic segmentation is not supported.
Please follow the prompts to upload the images and their corresponding labels. It is important to note that you must upload the images first and then upload the corresponding annotation files.

Crop image
If you want to use the "Crop image" function, please select it when creating a new model.
The image cropping function only supports object detection and semantic segmentation, and does not support OCR. It is suitable for scenes where the images are large but the target objects are small, such as detecting small spots or small cracks in industrial images.

This function not only crops the training images, but also automatically crops the testing images.
Please pay attention to the requirements for cropping the images when uploading.

Average dectetion rate
You can observe the performance of the model through the average detection rate. The higher the average detection rate, the better the performance of the model.
After training the annotated images, the model is used to detect these images again, and the average detection rate is obtained by comparing the annotation results and the prediction results.
The average detection rate only represents the performance of the model on annotated images. If the test images differ significantly from the annotated images, the detection performance may not be good.
If the average detection rate is low, the offline test result will be poor. Please increase the number of annotated images to improve the average detection rate.
Test result transfer
You can label a small number of images and use "Test Result to Annotation" to obtain a large number of pre-labeled images. The specific steps are as follows:
1.Label only a small number of images, train the model, and test the images. (The selected images should be typical, otherwise the training results will be poor.)
2.Check the tested images, use "Test result transfer" for the images that achieve the expected effect, and then click "Save".

3.Retrain the model. The new trained model has a larger sample capacity, so the training effect is generally better.
Show confidence level
If you want to know how confident the model's prediction results are, you can click on "More"-"Show confidence level" in the testing interface. The corresponding confidence level will appear next to the label.
Confidence represents the degree of trustworthiness of the predicted result, with a value range of [0, 1]. The closer the value is to 1, the more trustworthy the result is.
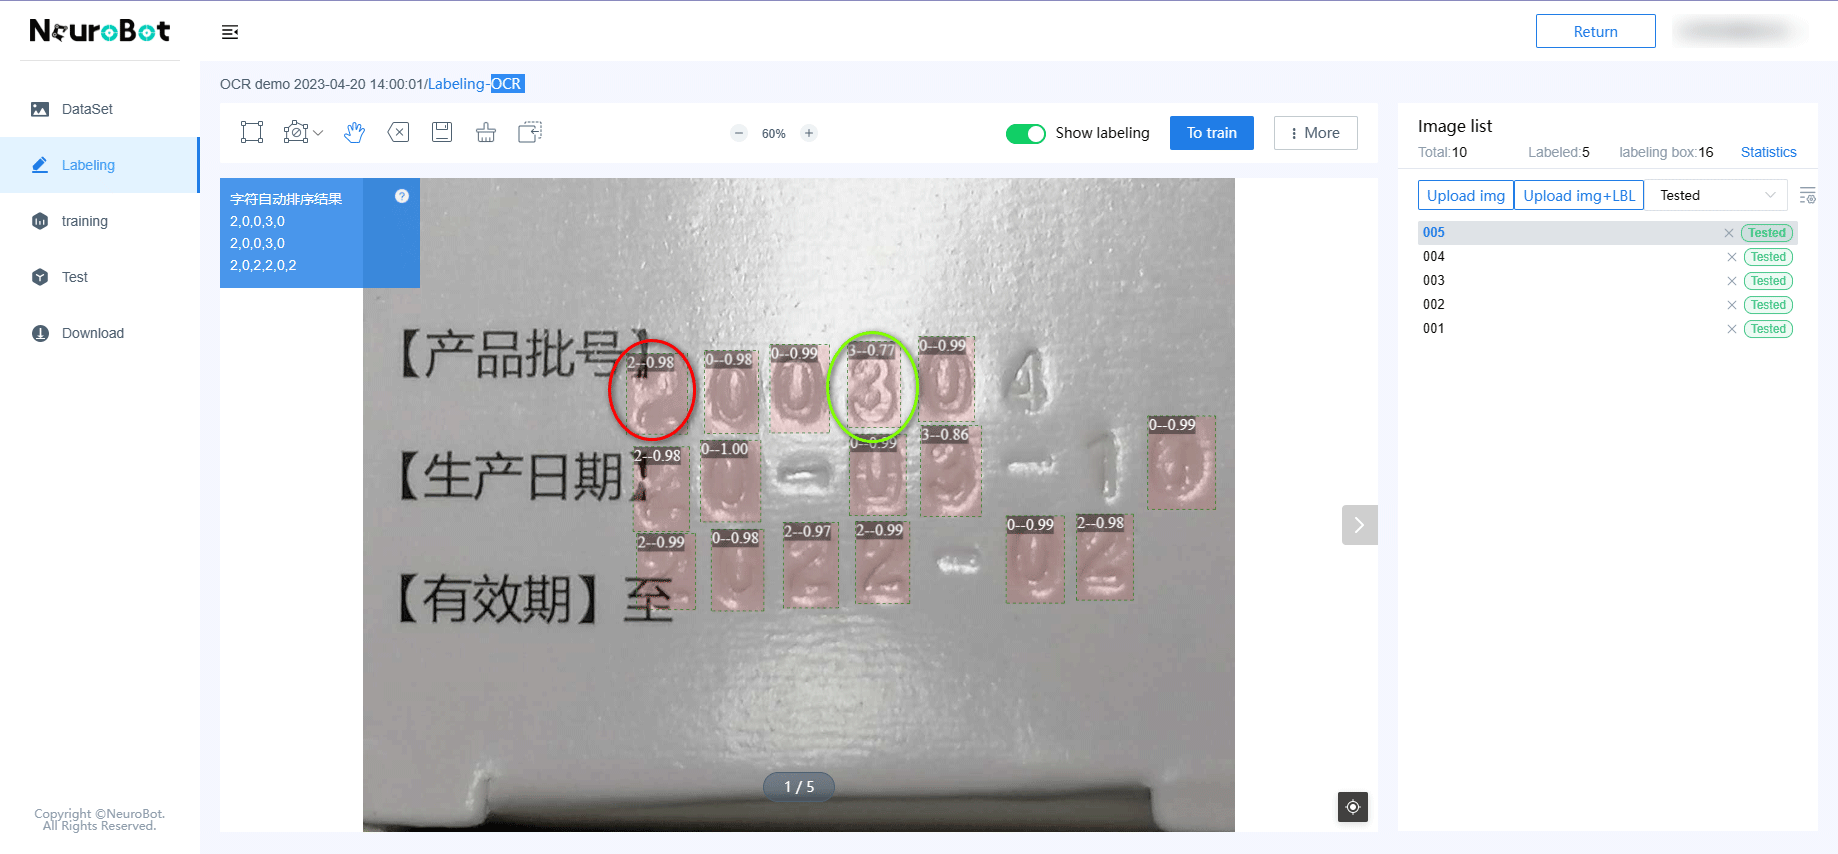
Please look at the red circle in the above picture. The predicted character result is 2. The confidence level is displayed after the character as 0.98, which indicates that the predicted result is very reliable.
As for the green circle, the predicted character result is 3. The confidence level is displayed after the character as 0.77, which indicates that the predicted result may be incorrect.